Då var det min tur att hålla i Day of Fun!! Jag har tänkt att dela med mig av två tutorials idag.
Today it's my turn to do the Day of fun! I'm going to show you two tutorials.
********
Jag hoppas att ni orkar ta er igenom hela blogginlägget utan att somna! Det är många bilder här ;)
Idag är det min tur och jag tänkte visa er hur jag färglägger med distresser, både dynor och flaskor.
I hope that you manage through this whole post without falling asleep! There's a lot of pitcures here ;)
Today, on my day of fun, I'm going to show you how I colour with distress inks, both pads and bottles.
****
Det här är vad jag har använt. En liten skål med vatten, akrylblock, en bra pensel, versa fine stämpeldyna (onyx black vattenfast) och naturligtvis distress inks.
Jag har använt dessa färger: Vintage photo, walnut stain, tattered rose, stormy sky, weathered wood ch spiced marmelad.
This is what I use. A small bowl of water, acrylic blocks, a great brush, versa fine ink pad (onyx black, water proof)colour palette and of course distress inks.
For this tutorial I used the following colours: vintage photo, walnut stain, tattered rose, stormy sky, weatered wood and spiced marmelad.
Det är svårt att hitta ett bra akvarellpapper. Jag har prövat dussintals men den enda som jag kan använda är cansons akvarellpapper 300g fine grain. Det tål mycket kladd med vatten utan att luckras upp!
På det här fantastiska papperet har jag stämplat upp Hänglars söta stämpel med versa fine. Den torkar på en gång.
It's hard to find an aqurelle paper that is good. I've tried dussins of them but the only one I like is Canson's 300 g fine grain paper. It can take a lot of smudging wth water without crumbling!
On this great paper I stamp my motife, in this case Hänglar's cute stamp, with the Versa fine ink. It dries up immediatly.
Jag börjar alltid med hudfärgen och blandar till några droppar tattered rose med wintage photo.
I always start with the skin colour, mixing a couple of drops tattered rose and vintage photo.
Jag målar en linje med hudfärgen där jag vill börja.
I draw a line with the mixed colours where I want to start.
Efter det doppar jag penseln i vatten så jag får bort all färg från den. Med vatten i penseln så tunnar jag ut färgen undan för undan.
Then I dip my brush in water to get rid of all colour and just blend the skin with regular water.
Jag tunnar ut färgen med vatten ända tills jag är nöjd.
I dip the pencil again and continue blending with water until I'm saticfied.
Håret är en blandning av walnut stain och vintage photo.
The hair is a mix between walnut stain and vintage photo.
När jag inte behöver blanda färger så använder jag bara stämpeldynorna och trycker dessa hårt mot ett akrylblock...
When I don't have to mix any colours I use the distress ink pads. I press it firmly against the block...
...och fångar upp det med min pensel.
...and gather it up with my brush.
Till kläderna har jag använt stormy sky.
For the clothes I use stormy sky.
tunna ut med vatten...
blend it out with water...
...och mer vatten :)
...and more water :)
Till byxorna använde jag walnut stain. Tänk på att vissa färger (som walnut stain) torkar snabbare än andra så jag kan inte lämna det outspätt längre än någora sekunder.
For the trousers I use walnut stain. Remember that some colours (walnut stain is like this) dries faster than other, so I can't leave it "unblended" for more than a few seconds.
Till månen använde jag spiced marmelad.
For the moon colour I used spice marmelad.
Här har jag använt weathered wood.
Here I've used weathered wood.
Jag använder samma färg till att göra som en skugga runt motivet.
I use the same colour for shadow around the motif.
Nästan klart nu!
It's almost ready now!
Jag använder torrchalks till att få färg på kinderna.
I use dry chalks to blush his cheeks.
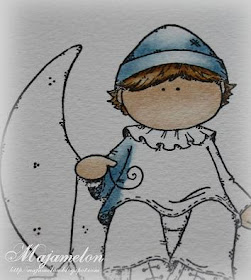
Så här ser det färdiga motivet ut :)
Here's the finished motif :)
Det är så här jag färglägger :)
And this is how I colour :)
**************************************
Och nu blir det en tutorial till!!
And now to one more tutorial!!
***
Det här är en perfekt present till nästan alla tillfällen. En ljuspåse.
This is a perfect gift at any occasion. A candle bag.
Jag har sytt till en påse på ca 18x15 cm.
I sew a bag that's 18 cm tall and 15 cm wide.
På just den här påsen har jag sytt på ett annat tyg och en spets för att göra den lite mer speciell, beroende på vilket tillfälle det är.
I sew on a lace and another fabric to make it a little more "special" depending on what it's for.
Jag använde en stämpel från Prima.
I used a stamp from Prima.
För att vara säker på att det blir ett bra tryck så lade jag cuttlebugens A...grej under :) och stämplade med vattenfast färg.
To make sure that there will be a good print I used the cuttlebugs A ...thing :) I also used a water proof ink.
Den här julen så ska jag ge bort ljuspåsar till min sons dagisfröknar. Eftersom jag inte har så mycket tid på mig så sydde jag "enkla" påsar. Ibland är det "ju mindre desto bättre" och jag gillar verkligen det stilrena med endast text på. Och dom blir ursnygga på kvällen när man stoppar ljus i dem!
Naturligtvis så måste man
stoppa i ett glas först eftersom påsen är gjord av tyg!! Så mät glaset först och sy upp påsen efter måttet :)
This christmas I'm going to give candle bags to my sons kindergarden teachers. Since I don't have so much time I made "simple" bags. But sometimes "less is more" and I really like these bags that have nothing else but stamps on them :) And they look gorgeous at evening with candles in them!
Of course, since they are made of fabrics you have to put a glass inside the bag!! So measure the glass first and than make the bag :)
***
Här har jag använt mig av Inkidos snygga textstämplar.
Here I've used Inkidos lovely text stamps.
Om du vill göra ett tryck som inte finns i stämpelmotiv så finns det något som heter Transfer paper. Det är ett papper som du stryker fast på tyg och använder skrivaren till att få det bilder du vill ha. Det är bara att kolla upp en speciell bild och skriva ut den! Eller kanske ett på sonen/dottern, husdjur, vintage foton eller göra din egen text.
If you want to do some motifes that aren't stamps there's something called Transfer paper. It's a paper that you iron on to fabrics and use the printer to get the pitcure you want! Just look up whatever you want, like vintage photos, photos of your kids, pets, loved ones or make your own text.
***
Jag skrev ut lite julbilder till min familj, som också ska få ljuspåsar till jul ;)
I choose pitcures after who is going to get it. My family is also getting candle bags for christmas ;)
...Jag måste verkligen stryka dessa! Jag såg först nu på bilden hur skrynkliga dom är haha :)
...I really have to iron them again! I see now that they look very wrinkled on pitcures haha :)
Lägg på bilden upp och ner. Om det är en text så måste den spegelvändas i photoshop (eller vilket program som helst som har den funktionen).
Put the pitcure up side down. If it is a text you have to reverse it in photoshop (or any program that can do that).
Slå på strykjärnet och dra det över bilden tills den sitter fast.
Heat up the iron and drag it over the pitcure until it is stuck.
Här är en färdig påse med ett änglamotiv.
Here's one ready with an angel.
Jag hoppas att ni gillade mina tutorials och har ni några frågor så är det bara att maila mig på stampartic@gmail.com
Hope that you enjoyed my tutorials on my day of fun and if you have any questions just mail me at Stampartic@gmail.com.
Jag skulle även vilja flagga lite extra för StampARTic's Facebooksida! Skynda in, gilla vår sida och få nyhetsuppdateringar från oss till nyhetsflödet! =D
I would like to take the opportunity to tell you about StampARTic's Facebook page! Hurry up in there and click on like to get the latest updates from us to your newsfeed! =D
Kram
Hugs
Malin


