StampARTic har det stora nöjet att få presentera
Tussan/Jessica Blixt Wendin för er! Tussan är DT för hÄnglar och stÄnglar hon har hållt på med kortmakeri sedan 2006. Tussan berättar att det tar 2-3 timmar för henne att göra ett kort och hon tycker bäst om lite tjockare papper som inte är för blankt. Hon gillar färger som inte är alltför skrikiga och inspireras av allt som kommer framför ögonen.
StampARTic have the big pleasure to introduce
Tussan/Jessica Blixt Wendin to you! Tussan is DT for hÄnglar and stÄnglar and she has been doing cards sence 2006. Tussan tells us that it takes 2-3 hours for her to make a card and that she prefer thicker paper that is not to shiny. She likes colour that is not to glaring and she is inspired of everything that comes infront of her eyes.
Tussan visar i den här artikeln hur hon gör när hon färlägger sina stämpelmotiv!
Tussan is showing in this article how she is colouring her rubbermotives!
Här har jag stämplat upp tre stämpelmotiv med vattenlöslig dyna. Det är viktigt att stämpeldynan är vattenlöslig vid den här tekniken. Jag använder Impress stämpeldyna
med Adirondack fungerar också utmärkt.
Here I have stamped three rubbermotives with watersoluble inkpad. It is important
that the inkpad is watersolubled in this technic. I use Impresse inkpad but
Adirindack is also working excellent.

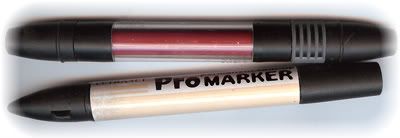
Jag målar med promarkers eller triamarkers. Promarkers har två spetsar medan
Triamarkers har tre spetsar.
I paint with promarkers or triamarkers. Promarkers have two tips while
Triamarkers have three tips.
Jag har målat väldigt ljust här för att visa hur mycket prismapennorna betyder senareför resultatet. På motiv 1 och 2 har jag använt Promarkers Blush till ansiktet och till motiv 3 Triamarkers nr 0729. Promarkers Ivory till hår, skor och klänning. Cinnamontill lådan och rosetterna är målade med Ruby.
I have paintet very bright here to show how much the prismapencils meens later on
for the result. On motive 1 and 2 I have used Promarkers Blush to the face and on
motive 3 Triamarkers 0729. Promarkers Ivory for hair, shoes and dresses. Cinnamon
to the box and the rosettes is painted with Ruby.

Därefter använder jag Prismapennor, som är en pigmentrik penna, för att lägga
skugggor. Jag köpte mina från USA men Fabercastells Polychromospennor
fungerar också utmärkt, de kan köpas i konstnärsbutiker.
Then I use Prismapencils, which is a pigmentrich pencil, to apply shadows. I bought
mine from USA but Faberscastells Polychromospencils works excellent too, they
can be bought in artshops.
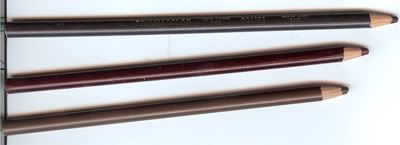
Jag börjar med att lägga en brun skugga i nederkanten av ansiktet, runt håret, byxor
och händer
I start with putting a brown shadow in the lower edge of the face, around the hair,
trousers and hands.

Nu är det dags att ta fram lösningsmedel...
Now it´s time to use Thinner/Sansodor...
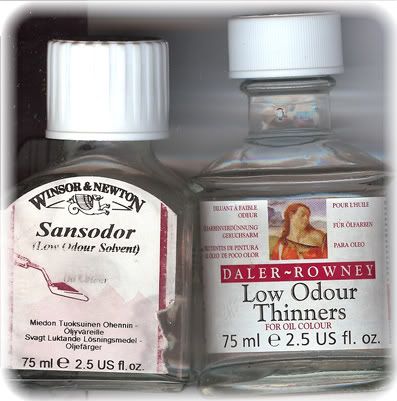
...och stompfar!
...And stompfs!

Jag börjar med ansiktet, där gnuggar jag med stora cirkelrörelser av avslutar med
att gnugga lite extra runt nederkanten. Övriga delar skuggar jag utifrån och in.
I start with the face, I rub with large circelmoves and ends with rubbing a little
extra in the lower edge. Other parts I shadow from outside and in.

Här har jag skuggat skorna och klänningarna i olika färger. 1= brun skugga2= grå skugga och 3= mörkt röd skugga.
Here I have out shadow on shoes and dresses with different colours. 1= brownshadow, 2= gray shadow and 3= dark red shadow

Sedan gnuggar jag ut de olika färgerna på samma sätt, utifrån och in. Färgen sitter kvar på stompfen så det underlättar att ha flera stycken. Man kan också vässa bort färgen i en vanlig pennvässare eller gnugga bort det mesta på kladdpapper.
Then I rub out the different colurs in the samt way, from outside and in. The colour is staying on the stompf so it is easier to have a couple. You can sharpen the stompf and then get rid of
the colour that way or rub of most of it on a paper beside.

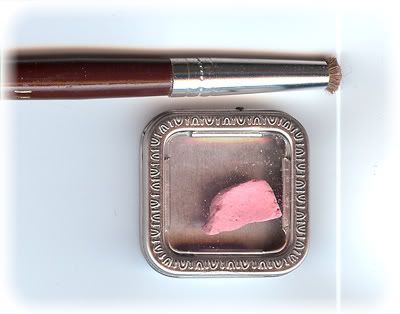
För att få rosiga kinder använder jag torrchalk och en avklippt pensel.
To have rosy cheeks I use decorating chalk an a cut brush.
Här har flickorna blivit rosiga och fina!
Here are the girls rosy and beatiful!
Sist av allt målar jag vita prickar på kinderna och lite streck på kläderna
för att få lite liv i bilden. Dessa två pennor använder jag:
Last of all I paint white dots on the cheeks and some lines on clothes
to have more life in the image. I use theese two pencils:

Nu är prickarna på plats!
Now the dots are in the right place!

Och vad hände sedan med dessa tre sötnosar när de var färdiga???
And then what happened with this three little darlings when the were done?
Här kommer tre ljuvliga kort, varsågoda!
Here comes three adorable cards, welcome!


StampARTic tackar
Tussan för en fantastisk artikel!
StampARTic is thanking
Tussan for an amazing article!




Wow! Great coloring tips, and amazing cards!
ReplyDeleteThank you for visiting us, Tussan!
hugs,
Jorunn!
WOW....This tutorial was awesome ...
ReplyDeleteYou have made some fantastic cards
Such a great tutorial, and the cards are wonderful!♥
ReplyDeleteThanks a bunch! :o)
Really great tutorial and lovely cards! Thank u :-)
ReplyDeleteWhat a great coloring tips, thanks a lot!
ReplyDeleteBRAVOS
ReplyDeleteSUPER TOP
MD
Thank you so much for this beautiful tutorial. Fantastic job.
ReplyDeleteHugs Nataliya.