A new tutorial from ARTsy-team, and this time we will show you how to do the gesso resist technique. This technique is easy and simple, and takes approx. 10 minutes to make. You can make the most awesome backgrounds in different colors and stamps...
Dette er et forslag på hvilke produkter du kan bruke til denne teknikken...
This is a suggestion of products to use for this technique...
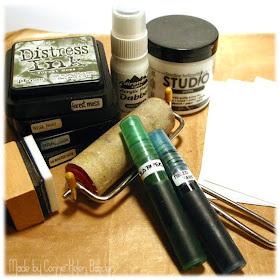 Du kan bruke følgende / You can use the following products together...
1. Gesso or Adirondack dabber + mini misters with distress reinkers
2. Gesso or Adirondack dabber + mini misters with distress reinkers & brayer
3. Gesso or Adirondack dabber + blending tool & distress inks
4. Gesso or Adirondack dabber + distress inks & brayer
Step one...
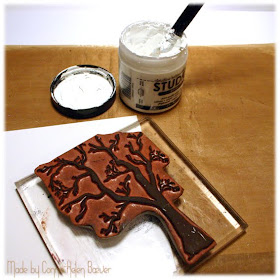
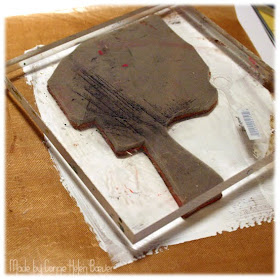
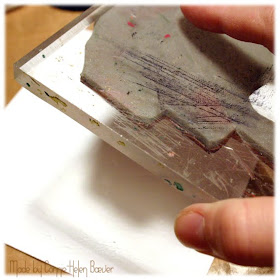 Begynn med å påføre et tynt lag med gesso på non-stick matte, og trykk stempelet nedi gessoen et par ganger. Stemple på ønsket kartong, der du ønsker trykket. Du kan selvfølgelig gjenta dette flere ganger ettersom hvor mange resist-trykk du ønsker.
NB! Du må vaske stemplet rett etter siste trykk, og da gjerne med en sprayflaske med vann og en våt klut.
Start by appliing gesso on a non-stick matt in a thin layer, and press the stamps a couple of times into the gesso. Use the stamp on your background paper, and continue until you have the wanted result.
NB! Remember to wash your stamp right after use, as the gesso dries fast. Use a spraybottle of water and a wet cloth.
Step two...
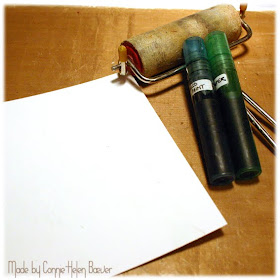 For å farge bakgrunnen min, så har jeg valgt å bruke mini misters med distress reinkers og brayer.
To color my background, I have used mini misters with distress reinkers and brayer.
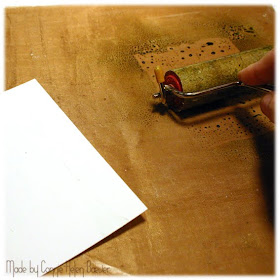
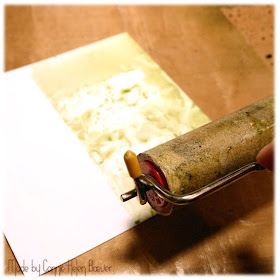
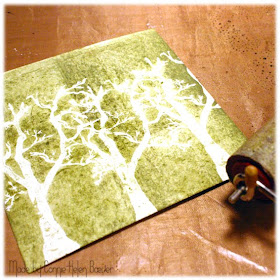 Bland et par farger på non-stick matta di, og her har jeg brukt fargene "peeled paint" og "old paper". Bruk brayeren din med farge til hele bakgrunnen din er dekt som vist over.
Mix a couple of colors on your non-stick matt, and here I have used "peeled paint" and "old papier". Use your brayer with the color until you have covered all of your background paper as shown above.
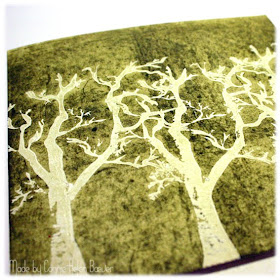 Et tips - sprut litt vann på tørkepapir og sveip over gesso-trykket. Da vil distressen bli overført på tørkepapiret, og trykket blir hvitere.
A tip - use some water on a towel and go over the gesso. This way the distress ink will be transfered to the towel, and the gesso-print will be more white.
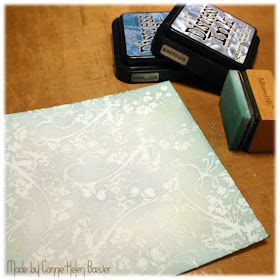 Her ser du hvordan bakgrunnen ser ut med gesso-resisit, distress blekk og blendig-tool.
Here's the background with gesso resist, distress ink and blending-tool.
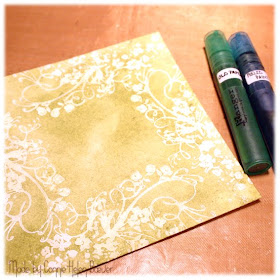 Her er samme bakgrunnsteknikk brukt, men med mini misters i stedet for brayer og blendig-tool. Varm gjerne med varmepistol for å få bakgrunnen din raskere tørr.
Here's the same technique, but with mini misters instead of brayer and blending-tool. By using the heatgun, your background will dry faster.
Inger's card...
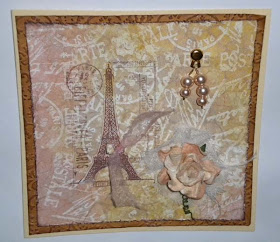
Connie's cards...
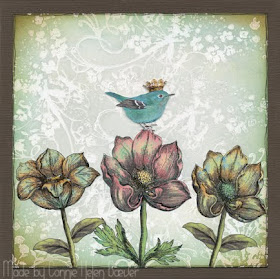
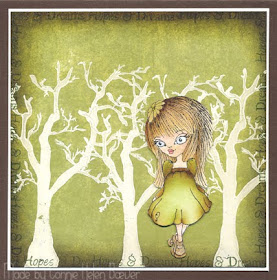 Vi setter utrolig stor pris på kommentarer til vår teknikk, og legg gjerne igjen en link til ditt "gesso resist"-kort :-)
We appriciate comments for our technique, and be happy to leave us a link to your gesso resist card :-)

Wow!!
ReplyDeleteDere slutter aldri å imponere meg!!
Såå lekre bakgrunner og nyydelige kort!!
Klem,
Jorunn
Kjempe flotte teknikkar!!! :)
ReplyDeleteLurte på ein ting. Skal gessoen tørka før ein tar farge på? Eg ha litt tru på da ;) men spør for å vera sikker :)
great tutorial and very informative. The result is stunning!
ReplyDeletethank you.
funny! i will try that sometime
ReplyDeletewow..det var stilig..har jeg aldri prøvd før..men det skal prøves:)
ReplyDeleteklem
Wow super tutorial, det må jeg prøve og rigtig flotte kort i har lavet!
ReplyDeleteAbsolutely wonderful. So delicious it becomes. Many thanks for the tip.
ReplyDeleteHugs Gurkiss
Hi Tinemor
ReplyDeleteAng. diss spørsmål til tutorialen vår på StampARTic, så må gessoen tørke først! Dvs, den tørker ganske raskt, så innen du har vasket stempelet så er det meste tørt. Dersom det fremdeles skulle være punkter som er våte, så bruk varmluftpistolen noen sekunder :-)
Tine askes if the gesso need to be dry before adding color, and the answer to that is "yes". It dries very quickly, but you are able to use your heatgun to dry it even faster :-)
I LOVE Gesso and these samples are wonderful. Thanks for sharing your technique.
ReplyDeleteKjempebra tutorial, Connie!
ReplyDeleteTusen takk for denne, det må prøves.
ReplyDeleteUtrolig flotte kort dere har laget.
Ønsker dere en fin uke.
*Gunn*
Dette var fantastisk nydelig Connie.
ReplyDeleteKlem fra Anne
Uhh hvor er det flot. TFS!!
ReplyDeleteKjempeflotte bakgrunner, og teknikk. Takk for steg-for-steg. Har allerede testet dette delvis ut, dvs gesso er påført, men fargen er ikke valgt enda! ;)
ReplyDeleteThanks for the tutorial, the cards are all lovely! Thanks for sharing. ~Diane
ReplyDeleteTusen takk for denne! Kjempeflott tutorial!! :D
ReplyDeleteскачать заставки на рабочий стол часы
ReplyDelete[url=http://failikitam.ru/sitemap.xml ] скачать учебники экзамен по геометрии [/url] скачать яндекс карты метро
[url=http://failupload.ru/sitemap.xml ] скачать новейшие игры на pc [/url]
http://kachaifile.ru/sitemap.xml
скачать torrent шейпинг-классик
http://filekachai.ru/sitemap.xml
скачать касперский для телефона
http://skachkafilov.ru/sitemap.xml
скачать игру русский бильярд 2009
Love your tutorial! Thanks for sharing. The cards are beautiful.
ReplyDeleteHei! Jeg lagde dette kortet før helgen.Kjempefin tutorial. http://jeanescrapping.blogspot.com/2010/08/inspired-by-stampartic-gesso-resist.html
ReplyDeleteBlir garantert flere kort i denne stilen hos meg fremover.
Kjempeflott teknikk! Den må jeg snart prøve, takker så for flotte tips! Nydelige kort dere lager!
ReplyDeleteFabulous - thanks!!
ReplyDeletetutorial very good and hopefully can help me
ReplyDelete