Teknikkurset er laget av Silje på ARTsy-teamet, og vi håper at dette enten er bra lærdom eller en oppfriskning av kjente teknikker :-) Håper kurset inspirerer mange til UTEE-lek.
This time we will show you an old technique, that maybe some of us has forgotten and others didn't know about. Ultra Thick Embossing Enamel is a thicker embossing powder, that are easier to cover larger areas with and easier to form. You can use it seperately or together with thin embossing powder.
Silje has made this technique in pictures for us, and we hope that it's giving all of you inspiration to play with UTEE.

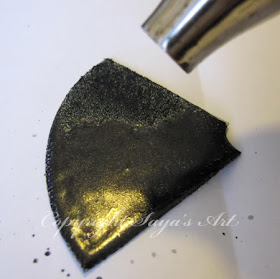
Silje har laget teknikken på en bit av en CD plate, men en bit tykk papp fugerer også kjempe fint! Eller annet som tåler litt varme uten å endre fasong.
Silje made this with a piece of CD, but you can also use a piece of very thick cardboard or something else that can withstand the heat of a heatgun.


Ta UTEE på en bit ved hjelp av passende blekk, smelt ... og gjenta prosessen noen ganger.
På min ble det vel en 5-6 lag...
Cover the piece totally with UTEE after you have applied clear ink on your item. Make this step approx. 4-6 times, until your piece is covered up with a thick layer of UTEE.


Strø på Perfect pearls, perler, glitter - hva du måtte ønske! Smelt det ned i UTEE'n.
You can add perfect pearls, beads, glitter, thin embossing or what you wish for, as long as it is some enought to "stick" into the UTEE.

Ha på pigment blekk på stempelet ditt. Bruk kun rødgummi stempler til dette! Trykk så stempelet ned i god/varm smeltet UTEE.
Use pigment ink on your stamp; it's important that you only use red rubberstamps. Push the stamp onto the item while it is warm.

La det ligge litt, til det blir litt kjøligere. Fjerne biten forsiktig fra stempelet.
Let the item get cold before you remove it from the rubberstamp.


Ferdig reslutat! / The result!
Inger's kort


Connie's kort


Please leave a comment, if you have any questions to our technique or you want to link back to your blog with your own UTEE-project. We love to see what you have done :-)

WOW, her var mye lekkert. Trur eg må leite opp meltingpotèn igjen for no fekk eg lyst å prøve igjen :D
ReplyDeleteFantastisk!!!
ReplyDeleteEr helt imponert over alt det dere får til!!!
Klem
jorunn
Wow, stunning creations and wonderful tutorial, thank you. UTEE is at the top of my wish list now :)
ReplyDeletevad kul att ni visar lite olika tekniker!
ReplyDeleteDet blev ju jätte mysig effekt!
Hur läckert som helst!! Tack för inspirationen!
ReplyDeleteKram / Eva
What a wonderful idea. I am going to try this but I have very few red rubber stamps. Congratulations
ReplyDeleteMaravillosa y creativa tecnica, en cuanto tenga estos ps materiales, hare algo parecido. Gracias por el tuto.
ReplyDeleteBesitos.
wow
ReplyDeleteWow, I love this technique. I am always on the lookout for ways to use up old CD's. How did Silje manage to cut the CD so straight. When I try to cut mine, they shatter into odd shaped pieces.
ReplyDeleteTack för alla kommentarer, vi uppskattar dem mycket!
ReplyDeleteGracias por tu comentario, lo apreciarnos mucho!
Thank you for your comments, they are very appreciated!
Allison - try to heat the CD before you cut it. Put it in hot water or heat it with a heatgun. It won't shatter if you cut it when it's warm.
Jag säger bara WOW!!!!!
ReplyDeleteSå vansinnigt snyggt- fantastiska kort tjejer!!!
Får verkligen lust att prova det här!!!!
Lillemor
Tusen takk for alle hyggelige kommentarer! : )
ReplyDeleteAlison - I use a pair of big sissors and cut out the Cd's, sometimes they shatter into odd pieces, but most of the time they cut strait... : )
veldig interessant, takk
ReplyDeletesaa kjekt at dere drar frem "gamle" teknikker. Og hvilke resultater!!! Nydelig!
ReplyDelete