Men det finns stenciler på andra ställen också. Jag har köpt plastgrejer på Ikea som jag har använt som stenciler och Netto har ibland extra pyssliga saker. Panduro är ett annat ställe. Men varför köpa? Du kan använda saker som redan finns i ditt hem eller tom göra din egen, helt personliga stencil.
Oftast är stencilen gjord i stadig plast men den kan även göras i hårdplast eller metall och de kallas även för masker. Dock brukar masker vara en negativ stencil, dvs, själva motivet lämnas ofärgat.
Färga in? Hurdå? Det enda som begränsar dig är din fantasi. Du kan måla eller dabba med akrylfärg. Använd en penna och rita runt, kanske för att färglägga det med annan färg efteråt. Det finns många colour washes och sprejer och du kan också välja att blanda din egen. Prova gesso, gel medium eller varför inte någon dimensional paint. Du kan dabba på lim och strössla över glitter eller flock. Varför inte använda watermarkdyna och chalks eller embossing om du är tillräckligt snabb!
Och när du är färdig med allt, glömt inte att prova att vända på stencilen och tryck mot pappret för att få ett negativt tryck!
This week it's all about stencils which I think most of you are acquainted with. In our last article, some of the members in the Artsy team worked with stencils in our Dylusion challenge. There are numerous other manufactors, some are Crafter's workshop, Prima, Dreamweaver, Tim Holtz, Heidi Swapp and Tattered Angels.
But there are stencils in other places too. I've bought plastic thingies on Ikea that I've used as a stencil and other stuff in food stores. But why buy at all? You can find things to use as stencils around your house or why not try to make one of your own.
Most of the times a stencil is made of thin, but sturdy plastic but it can aslo be made in hard plast or metal and they also go under names as masks and templates. A mask is however most of the times a negative stencil, that is, you leave the motif white and colour around it.
Colour it you say, how do you do that? Well, only your imagination is the limit. You can paint or dab it with acrylic paint. Use a pencil and draw the shape, maybe colour it afterwards. Use some of all of the available colour washes and sprays or make one of your own. Grab your gesso or gel medium or why not some dimensional paint to get a raised motif. You can dab some strong glue on it and add glitter or flock. Why not press watermark ink on it and use chalks or emboss it if you're fast enough!
And when you're done with it, turn it around and press it on the background to get a negative print!
Enjoy our creations!
På kortene har
jeg brukt ColorWash og vann for å lage bakgrunnene mine. Har latt de
tørke. For så å legge en stensil over og sprayet med mer ColorWash.
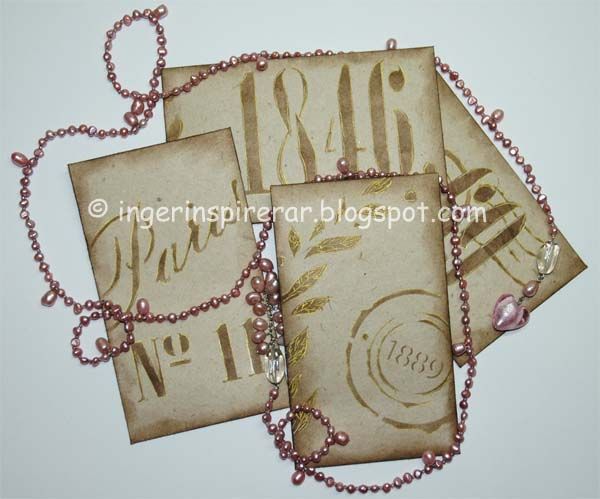
On my cards I've used ColorWash and water to create the backgrounds. Then let it dry. Before I used a template over the entire background and sprayed with more ColorWash.
Crafter's workshop - Cursive Alphabet stencil

Crafter's workshop - Harlequin stencil
Art Journal-side der bakgrunnen er laget med Gelatos fra Faber-Castell blandet som er blitt påført vann for å blandes. Stensilen som er brukt er fra Prima hvor det er påført sort Gelatos. Skriften er håndskreven med sort Sharpie.
Art Journal-page where the background is made of Gelatos sticks and water. Brickwall stencil are from Prima, and I have used black Gelatos. Letters are handwritten and here I have used a black Sharpie.
Tagen er laget med Dylusions produkter, og her er stensilen "Let it snow" brukt. Motivene er fargelagt med Dylusions spray på vannpensel, og teksten er stemplet på Sticky Back Canvas med Archival blekk.
This tag is made with Dylusions products, and I have used the stencil called "Let it Snow". Motifs are colored with waterbrushes filled with Dylusions sprays, and the text is stamped on to a Sticky Back Canvas from Claudine Hellmuth.
Vek egna kuvert av kraft papper och stöpplade på Distress ink, walnut stain. Ritat med en guldpenna. Dessa kuvert kommer att infogas i en junk book om inredning. Stencilen kommer från Panduro.
I've used kraft paper to fold envelopes that I dabbed with Distress ink, walnut stain. Drew around with a gold pen. These envelopes will be added to a junk book about decorating my home. The stencil is from Panduro.
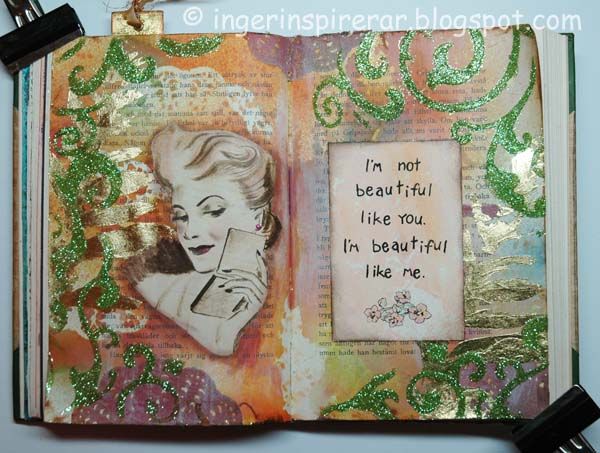
Här är ytterligare ett uppslag i min altered book. Använde en pappersdoily som jag sprejade. Vände på den för att få fram det negativa trycket på några ställen. Dabbade på lim genom en andra stencil och lade på bladguld. Det tredje lagret är gel medium påfört med spatula över ytterligare en stencil. Tog bort stencilen och hällde på glitter. Motivet är från en gammal tidning och texten är stämplad. Båda stencilerna kommer från Panduro.
This is one of the pages in my altered book. First I used a paper doily and sprayed on it, then I reversed it on some places to add the negative motif. I added glue over a stencil and put metal gold on it. The last layer is added gel medium with a spatula over a third stencil. I removed the stencil and poured glitter on the book page. The motif is from an old magazine and the text is stamped. Both the stencils are from Panduro.
Time for you to show us your work or for us to answer your questions!


Superb blog.. Thanks for sharing this blog information with us…
ReplyDeleteCloud Database
All information really useful. I love your stuff very much.Thanks for sharing this helpful post.
ReplyDeletehospitals in doha qatar clinics in doha qatar
Adbee solutions are doing the best digital marketing services coimbatore.
ReplyDeleteKEM Builders launch new villas in Kizhakkambalam
ReplyDeleteMuqqabla shopping app provide the pet grooming in Bangalore
ReplyDelete