
Stenciler och masker är något som har funnits ett tag men har fått ett rejält uppsving genom Heidi Swapps och Tim Holtz produkter. Vad är då skillnaden på dessa plastiga saker? Enkelt sagt är de motsatser till varandra! Med stenciler färgar du in själva motivet men med en mask blir det som ett negativ till stencilen.
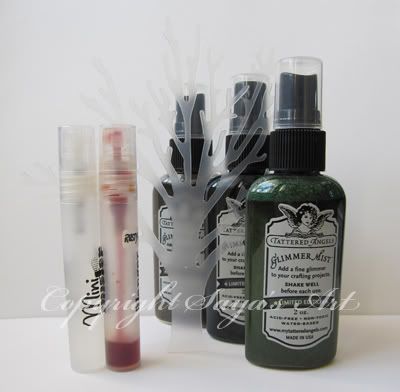
Det finns massor av producenter men de mest kända maskerna är som sagt av Tim Holtz och Heidi Swapp. Även tattered angels har börjat producera dem vilket passar ypperligt till deras glimmer mist. De är gjorda i tunn plast med en lätt självhäftande baksida som håller masken på plats när du använder den.
Stenciler finns också i tunn plast men är inte självhäftande. Vanligare är dock att de är gjorda i tjockare plast eller i tunn mässing. Ett tjockare material gör att man kan använda dem på ett annat sätt och med andra medium. Mässingsstenciler finns bla av Lasting Impression, Dreamweaver och All Night Media.
Men varför begränsa dig till de mest kända märkena? Jag har köpt stenciler i mataffären Netto, Panduro (inte lika förvånande kanske) samt Ikea (matavdelningen). Även färgaffärer har schabloner (stenciler) som är tänkta att användas till att måla dekor på väggen.
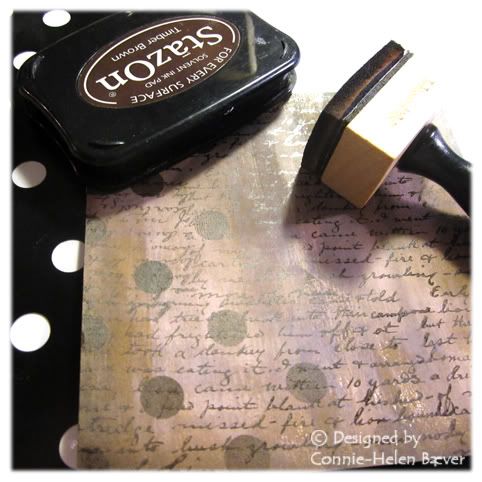
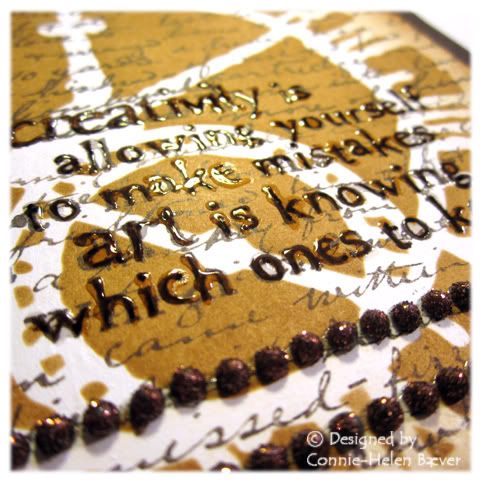
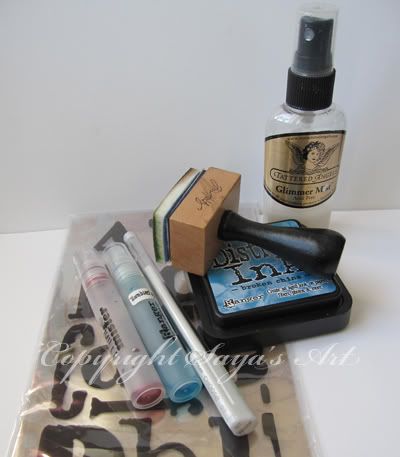
Väldigt vanligt är att använda dem tillsammans med stämpeldynor och blending foam eller att spreja. Du kan använda akrylfärg, lim tillsammans med antingen bladguld eller funflock/glitter, gel medium, moulding paste och gesso eller helt enkelt att bara rita runt stencilen. Dutta på med embossingdynan och testa att embossa det!
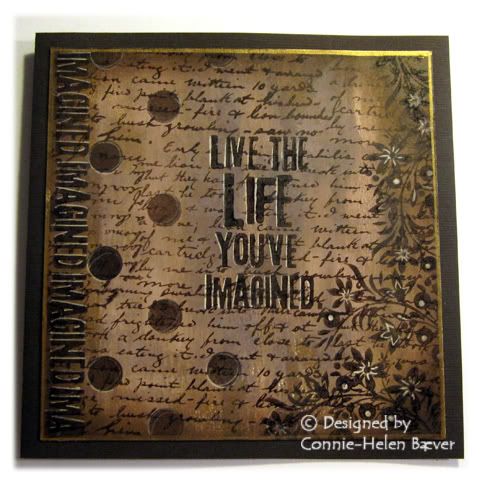
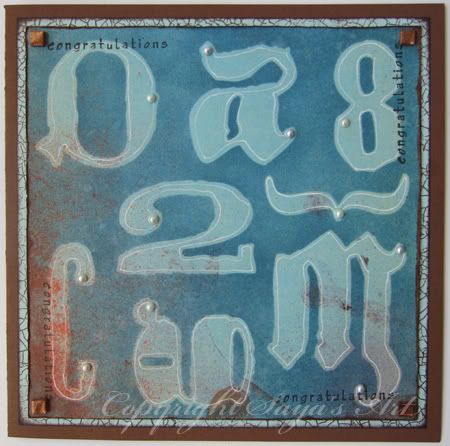
Bakgrund eller huvudmotiv, det bestämmer du. Det är snyggt både som platt och som relief eller varför inte en kombination? Mask och/eller stencil på mönstrat papper kan bli ursnyggt!
Har du en egen idé om vad du vill ha för mask eller stencil men inte hittar den kan du lätt göra en egen! Skriv ut, rita eller stämpla på OH-papper och skär ut med skalpell. Du kan också göra din egen stencil i ett bildprogram av exempelvis ett fotografi. Det allra enklaste måste ju dock vara att använda din diecut maskin eller silhouette (eller liknande)!
Stencils and masks have been available for quite some time but with products from Heidi Swapp and Tim Holtz they are being revived again. There are lot of producers but the most known are from Heidi Swapp and Tim Holtz. Even tattered angels have masks which is a perfect match with their glimmer mist. The masks are made of thin plastic with adhesive on the back that keeps the mask in place while you're using it.
Stencils too are made in thin plastic but with no adhesive on the back. More commonly though is those made of thicker plastic or thin brass. A thicker material enables you to use them in different ways and with other media. Producers like Lasting Impresstion, Dreamweaver and All Night Media makes brass stencils.
But there's no need to only be limited to known brands, I've bought stencils at the local food shop Netto, at Panduro (not that surprising) and at the food department at Ikea. You can even find stencils at the paint department at DIT stores which are meant to be used to paint decorative borders on the wall.
The most common way is to use these with stamp pads and a blending tool or to spray them. But You can also use acrylic paint, glue together with gold leaf or fun flock/glitter, gel medium, moulding paste and gesso or simply draw around the stencil or mask. You can dab with your embossing pad and try to emboss the motif.
Background or main motif, it's up to you. It looks good both flat and embossed or why not a combination. Mask and/or stencil on patterned paper could be gorgeous!
If you have your own idea of what kind of mask or stencil you want but can't find it, you can simply make you own. Print, draw or stamp om acetate paper and cut with a scalpel. You can also make your own stencil in a photo edicint program from say a picture. The most simple way must however be using your die cut machine or silhouette (and similar)
Det finns massor av producenter men de mest kända maskerna är som sagt av Tim Holtz och Heidi Swapp. Även tattered angels har börjat producera dem vilket passar ypperligt till deras glimmer mist. De är gjorda i tunn plast med en lätt självhäftande baksida som håller masken på plats när du använder den.
Stenciler finns också i tunn plast men är inte självhäftande. Vanligare är dock att de är gjorda i tjockare plast eller i tunn mässing. Ett tjockare material gör att man kan använda dem på ett annat sätt och med andra medium. Mässingsstenciler finns bla av Lasting Impression, Dreamweaver och All Night Media.
Men varför begränsa dig till de mest kända märkena? Jag har köpt stenciler i mataffären Netto, Panduro (inte lika förvånande kanske) samt Ikea (matavdelningen). Även färgaffärer har schabloner (stenciler) som är tänkta att användas till att måla dekor på väggen.
Väldigt vanligt är att använda dem tillsammans med stämpeldynor och blending foam eller att spreja. Du kan använda akrylfärg, lim tillsammans med antingen bladguld eller funflock/glitter, gel medium, moulding paste och gesso eller helt enkelt att bara rita runt stencilen. Dutta på med embossingdynan och testa att embossa det!
Bakgrund eller huvudmotiv, det bestämmer du. Det är snyggt både som platt och som relief eller varför inte en kombination? Mask och/eller stencil på mönstrat papper kan bli ursnyggt!
Har du en egen idé om vad du vill ha för mask eller stencil men inte hittar den kan du lätt göra en egen! Skriv ut, rita eller stämpla på OH-papper och skär ut med skalpell. Du kan också göra din egen stencil i ett bildprogram av exempelvis ett fotografi. Det allra enklaste måste ju dock vara att använda din diecut maskin eller silhouette (eller liknande)!
Stencils and masks have been available for quite some time but with products from Heidi Swapp and Tim Holtz they are being revived again. There are lot of producers but the most known are from Heidi Swapp and Tim Holtz. Even tattered angels have masks which is a perfect match with their glimmer mist. The masks are made of thin plastic with adhesive on the back that keeps the mask in place while you're using it.
Stencils too are made in thin plastic but with no adhesive on the back. More commonly though is those made of thicker plastic or thin brass. A thicker material enables you to use them in different ways and with other media. Producers like Lasting Impresstion, Dreamweaver and All Night Media makes brass stencils.
But there's no need to only be limited to known brands, I've bought stencils at the local food shop Netto, at Panduro (not that surprising) and at the food department at Ikea. You can even find stencils at the paint department at DIT stores which are meant to be used to paint decorative borders on the wall.
The most common way is to use these with stamp pads and a blending tool or to spray them. But You can also use acrylic paint, glue together with gold leaf or fun flock/glitter, gel medium, moulding paste and gesso or simply draw around the stencil or mask. You can dab with your embossing pad and try to emboss the motif.
Background or main motif, it's up to you. It looks good both flat and embossed or why not a combination. Mask and/or stencil on patterned paper could be gorgeous!
If you have your own idea of what kind of mask or stencil you want but can't find it, you can simply make you own. Print, draw or stamp om acetate paper and cut with a scalpel. You can also make your own stencil in a photo edicint program from say a picture. The most simple way must however be using your die cut machine or silhouette (and similar)
Inger's cards


Connie's cards


 Silje's cards
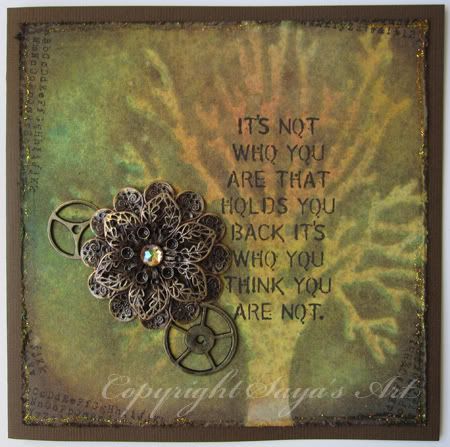
 Please leave a comment if you have any questions or you want to link back to your blog with your own project. We would love to see what you have done!
4 comments:
Takk for mange flotte tips og ideer!
Kjempestilige kort! : )
Fina kort och roliga idéer! =)
Kram Elenor
WOW! Underbara kort!
Kram SasSa
Post a Comment