Sunday, January 30, 2011

Walk of Fame - January 2011


Det er tid til at præsentere de kort vi har fundet til Walk of Fame. Som vi plejer, finder vi de mest fantastiske kreationer ude i blogverdenen og det er en stor ære at præsentere kortene vi har valgt til WoF.

Det er tid for å presentere kort vi har funnet til Walk of Fame. Som vanlig finner vi de mest fantastiske kreasjoner der ute i bloggverden og det er en stor ære å presentere kortene til 'WoF'

Det är tid att igen presentera våra val av kort till Walk of Fame. Vilken otroligt runda vi har haft. Vi hittade det mest otroligt vackra kort och vi har glädjen att visa kortena vi valt till 'WoF'.

It's time to present to you our choices of cards for Walk of Fame. We did have the most incredible journey looking for cards. It's a pleasure to show our choices for 'WoF'.

On aika kertoa mitkä kortit on tässä kuussa tullut valituksi Walk of Fame joukkoon. Mikä uskomaton blogikierros onkaan takana ja löysimme mitä uskomattomia kortteja. Meillä on kunnia esitellä teille tämän kuun valintamme 'WoF' sarjaan.

Walk of Fame
January 2011


Gratulerer * Congratulations* Onnea


Thursday, January 27, 2011

Post-it® easel - Tutorial


Staffelikort, er kjent for de fleste, og Post-it®
  blokker dekorerer vi på mange forskjellige måter. I dag vil jeg vise en kombinasjon av disse, et Post-it® staffeli, som er både praktisk og dekorativt.
Jeg begynner med å lage en liten eske som passer akkurat til Post-it® blokka.
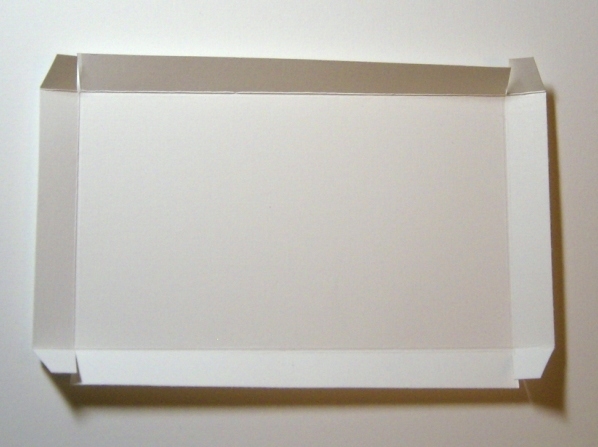
Start med å kutte en 6” / 4” kartong, og preg ½” inn på alle fire sidene. Klipp ned til pregekanten på fire sider, og skråklipp klaffene litt som du ser på bildet.

*******

Easel cards are well known for many of us, and we decorate Post-it®
  notes in many different ways. Today I want to show you a combination of these two. A Post-it®
   easel, both practical and decorative.

I start by making a small box that fit the Post-it® notes.
Cut the cardstock 6” / 4”, and score ½” in on all four sides. Cut down to the score line on four sides like you see in the picture.


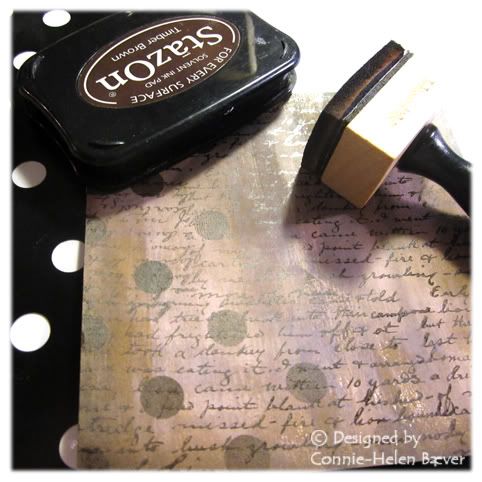
Jeg bruker mønsterark både på utsiden og på innsiden. På innsiden vill det ikke synes på godt når Post-it® blokka kommer på plass, men det gjør esken mer solid.

*******
I use patterned paper both inside and outside the box. It may not show much on the inside, but it makes the box more solid.

Mønsterark / Patterned paper: 3/8” / 4  7/8” - 4 stk

                                             3/8” / 2  7/8" - 4 stk


Her har jeg limt mønsterark på alle sidene utenpå esken.

*******
Here I have placed the papers outside the box.


Inni esken begynner jeg med å lime mønsterark på kortsidene…

******
Inside the box I fasten the short paper stripes…


Så monterer jeg esken før jeg limer mønsterark på langsidene. Da skjuler jeg skjøtene på esken.

*******

Then I make the box ready before I add the last paper stripes. This way I will cover up the tabs on the box.


Her har jeg markert midten, og tegnet og klippet ut en halvsirkel.
Nå er esken min ferdig, og det er på tide å begynne på staffeliet.

*******

Here I have marked the middle on the front, and cut out a half circle.
Now the box is ready, and it is time to make the easel.


Jeg begynner med kartong på 12” / 6”.
Jeg finner midten, og lager en pregekant ¼” til hver side for midten. Dette blir en ½” bred rygg, som gjør at kortet ligger flatt når det er lukket igjen.
Lag en brettekant midt på det ene store feltet, og fasongen er ferdigbrettet.

*******
I start with a 12” /6” cardstock.
Find the middle of the cardstock, and score a line ¼” out from the middle to both sides. This will make a ½” back on the card, and your card will stay flat when you close it.
Now score a line in the middle of one of the large areas, and the shape of the easel is finished.


Her har jeg dekorert alle feltene på innsiden med mønsterpapir…

*******
Here I have decorated all areas on the inside with patterned paper…


..og her har jeg gjort det samme på utsiden.

*******
..and I have done the same on the outside.


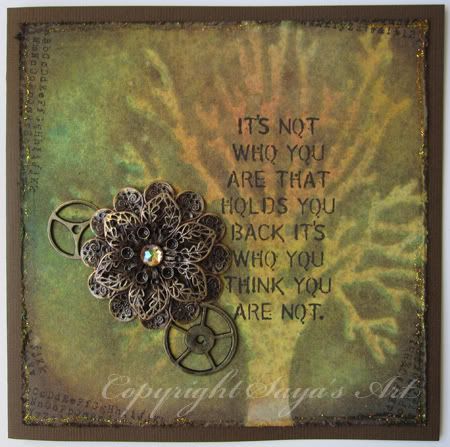
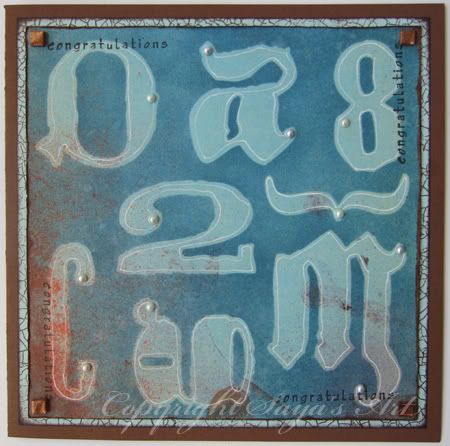
Nå er det på tide å lage og dekorere fronten på staffeliet. Jeg har brukt et kvadrat på 13cm/13cm, men du kan selvfølgelig bruke hvilken størrelse eller fasong du vil.

*******
Now it is time to make and decorate the front. My front is a 13cm/13cm square, but you can use any size and shape you like.


Jeg bruker teip bare på den nederste delen, og fester fronten til staffeliet.

*******
I use tape only on the lower part, and fasten the front to the easel.


Jeg bruker dobbeltsidig teip til å feste Post-it® blokka oppi esken, og esken til staffeliet.
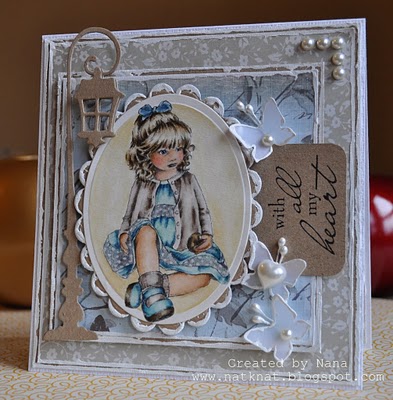
Her er prosjektet mitt helt ferdig.

*******

I use double sided tape to fasten the Post-it® notes to the box, and the box to the easel.
Here my project is all finished.


Her er Post-it® staffeliet lukket igjen.

*******
Here you can see how it looks when it is closed.


Jeg håper du likte tutorialen, og ble inspirert til å gjøre et forsøk.

*******

I hope you liked my tutorial, and that you got inspired to give this a try.

Monday, January 24, 2011

Shopping tip January 2011

A new year and time for some new shoppingtips.
Did you know January is the worst month economically?
I certainly feel that *lol*
and long for payday. :)
So this month there´s nothing too expensive among the tips.
But I think we all need some craft material shopping so 
lets see what the we in StampARTic team have found this time.


Marianne:

My shopping tip this time is these beautiful dies from Marianne Design.
They are thin like Spellbinders, and works in most cutting machines,
and they are all wonderful with beautiful details.
I found these at Unik Hobby.
Donna:

My shopping tips this time is these wonderful clear stamps from 
Hero Arts: Friendly Flags,
I found these at Kreative Fornemmelser


Jorunn:

Need just the perfect detail for your valentine cards??
Then I have a great tip for you...
Whiff of Joy has some amazing new dies out;
Some gorgeous heart border dies and heart shaped dies:


Lene:

My shopping tips this time is these beautiful digi stamps from
Sugar Nellie Stamps...
I found these adorable stamps


Eva:

The other day I got  a package with some new 
lovely laces that I´ve ordered from Pysseltagen.
It was "love at first sight" and they are my shopping tips today:


Nice as they are and even better with a ribbon in a matching colour :)   :


At Pysseltagen you can also find them with edges in peach and baby blue, 
and I´ve seen them at Wild Orchid Crafts in Baby Pink and Lilac as well.

While I was at it I bought just a few more:


SasSa:

I have a three tips this month.
First some Seam binding ribbon - Hug Snug 
Just $7,95  for 100 yards.
With that I made my own blue crinkled ribbon using this video 
Ideal for those vintage projects.


My next 2 tips are digital stamps from two of my new favorites 
Digital stamps are a great to use. 
You can use it as many times as you wish and how big or little you want.

KennyK makes for ex the most lovely Sassy girls and


Make it crafty wonderful scenic stamps.
Awesome to combine with your favorite stamps.


 So that was all we had for January
I hope you found something you like.
Happy shopping!!!
And a great week to you all!
~StampARTic team~

Saturday, January 22, 2011

Two New DT members on the ARTsy team!

Vi har i desember og januar søkt etter nye medlemmer på ARTsy-teamet, og vi har valgt ut to av dem som har søkt! De kommer til å bli et veldig bra tilskudd til teamet vårt, og vi er stolte over at å presentere...

We have been searching for new DT member on the ARTsy-team, and we finally decided to choose two of them. We are sure that these two will be a very good addition to our ARTsy-team, and we are happy to present...

Velkommen til Vigdis / Welcome to Vigdis


Vigdis er en dreven kortlager, og hun har sansen for masse stæsj, blomster og mikse forskjellige stilarter. Hun behersker den artsy-stilen like bra som hun behersker den søte stilen, og hun er helt rå på å lage bakgrunner. Vigdis kommer i fra Larvik, og har vært på designteamet til Kreativ Hobby i mange år. Latteren sitter alltid løst hos Vigdis, og hun har et smittende herlig humør. Takk for at du vil være med på teamet vårt, Vigdis :-)

Vigdis is a very skilled cardmaker, and she loves to make cards with a lot of assessorieses, flowers and mix different styles. She master the artsy-style as well as the sweet style, and she makes the most awesome backgrounds. Vigdis is from Larvik, and have been on Kreativ Hobbys designteam for many years. Thanks for joining us, Vigdis :-)


Velkommen til Yvonne / Welcome to Yvonne


Yvonne er kjent for sin lekne stil, og har ofte gesso og multi-medium ved sin side. Hun leker seg frem til flotte bakgrunner, og er en mester til å fargelegge motiver med distress blekk og vannpensel. Hun behersker den artsy-stilen med glans, i tillegg til at hun lager søte kort. Og vi gleder oss til å se mer av den artsy-stilen fremover :-) Yvonne bor i Lillestrøm, og er kjent for sitt sprudlende humør og morsomme humor! Takk for at du blir med, Yvonne :-)

Yvonne is well known for her playful style, and she has always gesso and multi-medium by her side. She makes the most amazing backgrounds, and she's a master in coloring with distress ink and waterbrush. She makes artsy-cards as well as cute cards, and we are looking forward seeing artsy cards from her side in the months to come :-) Yvonne lives in Lillestrøm, and we are happy to have you on our team, Yvonne. Thanks :-)


Sunday, January 16, 2011

Stencils and masks

Stenciler och masker är något som har funnits ett tag men har fått ett rejält uppsving genom Heidi Swapps och Tim Holtz produkter. Vad är då skillnaden på dessa plastiga saker? Enkelt sagt är de motsatser till varandra! Med stenciler färgar du in själva motivet men med en mask blir det som ett negativ till stencilen.

Det finns massor av producenter men de mest kända maskerna är som sagt av Tim Holtz och Heidi Swapp. Även tattered angels har börjat producera dem vilket passar ypperligt till deras glimmer mist. De är gjorda i tunn plast med en lätt självhäftande baksida som håller masken på plats när du använder den.

Stenciler finns också i tunn plast men är inte självhäftande. Vanligare är dock att de är gjorda i tjockare plast eller i tunn mässing. Ett tjockare material gör att man kan använda dem på ett annat sätt och med andra medium. Mässingsstenciler finns bla av Lasting Impression, Dreamweaver och All Night Media.

Men varför begränsa dig till de mest kända märkena? Jag har köpt stenciler i mataffären Netto, Panduro (inte lika förvånande kanske) samt Ikea (matavdelningen). Även färgaffärer har schabloner (stenciler) som är tänkta att användas till att måla dekor på väggen.

Väldigt vanligt är att använda dem tillsammans med stämpeldynor och blending foam eller att spreja. Du kan använda akrylfärg, lim tillsammans med antingen bladguld eller funflock/glitter, gel medium, moulding paste och gesso eller helt enkelt att bara rita runt stencilen. Dutta på med embossingdynan och testa att embossa det!

Bakgrund eller huvudmotiv, det bestämmer du. Det är snyggt både som platt och som relief eller varför inte en kombination? Mask och/eller stencil på mönstrat papper kan bli ursnyggt!

Har du en egen idé om vad du vill ha för mask eller stencil men inte hittar den kan du lätt göra en egen! Skriv ut, rita eller stämpla på OH-papper och skär ut med skalpell. Du kan också göra din egen stencil i ett bildprogram av exempelvis ett fotografi. Det allra enklaste måste ju dock vara att använda din diecut maskin eller silhouette (eller liknande)!

Stencils and masks have been available for quite some time but with products from Heidi Swapp and Tim Holtz they are being revived again. There are lot of producers but the most known are from Heidi Swapp and Tim Holtz. Even tattered angels have masks which is a perfect match with their glimmer mist. The masks are made of thin plastic with adhesive on the back that keeps the mask in place while you're using it.

Stencils too are made in thin plastic but with no adhesive on the back. More commonly though is those made of thicker plastic or thin brass. A thicker material enables you to use them in different ways and with other media. Producers like Lasting Impresstion, Dreamweaver and All Night Media makes brass stencils.

But there's no need to only be limited to known brands, I've bought stencils at the local food shop Netto, at Panduro (not that surprising) and at the food department at Ikea. You can even find stencils at the paint department at DIT stores which are meant to be used to paint decorative borders on the wall.

The most common way is to use these with stamp pads and a blending tool or to spray them. But You can also use acrylic paint, glue together with gold leaf or fun flock/glitter, gel medium, moulding paste and gesso or simply draw around the stencil or mask. You can dab with your embossing pad and try to emboss the motif.

Background or main motif, it's up to you. It looks good both flat and embossed or why not a combination. Mask and/or stencil on patterned paper could be gorgeous!

If you have your own idea of what kind of mask or stencil you want but can't find it, you can simply make you own. Print, draw or stamp om acetate paper and cut with a scalpel. You can also make your own stencil in a photo edicint program from say a picture. The most simple way must however be using your die cut machine or silhouette (and similar)

Inger's cards


Connie's cards

Silje's cards


Please leave a comment if you have any questions or you want to link back to your blog with your own project. We would love to see what you have done!