Tuesday, September 13, 2011

Tutorial - Tea box


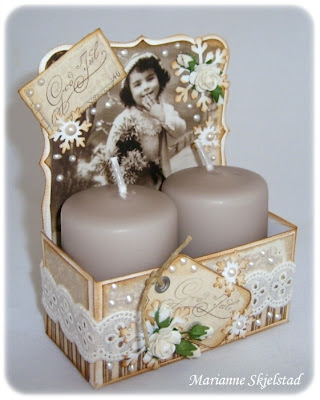
I dag vil jeg vise hvordan du kan lage en åpen te eske. Denne tar seg godt ut på frokostbordet, eller er en perfekt liten gave. Om du ikke er en te drikker, så gjør det ingenting. Jeg har laget målene på denne esken til å passe små kaffeposer med cappuccino ol. også. Og liker du ikke kaffe heller, så fyll esken med sjokolade, eller hva du måtte ønske:)

Størrelsen på esken er lett å tilpasse det du vil. Lag grunnflaten til esken i den størrelsen du vil, og følg den samme fremgangsmåten.
Du får noen eksempler helt til slutt.

*******
Today I want to show you how to make an open tea box. It will look great on your breakfast table, or it is a perfect little gift. Not much of a tea drinker? Don`t worry, I have made the size of this box to also fit the small coffee bags of cappuccino etc. Not too fond of coffee either? Fill the box with chocolate or whatever you like:)

The size of this box is easy to adjust. Just make the bottom of the box the size you need, and then follow the steps of my tutorial.
I will give you some examples in the end.

______________________
Start med kartong 14cm / 22,5cm.
Preg 4cm inn fra alle sider, og klipp inn hakk som du ser på bildet.
Jeg har sotet alle kanter på både innsiden og utsiden med Distress Ink – Vintage Photo.

*******
Start with 14cm / 22,5cm cardstock.
Score 4cm in from all four sides, and cut it like you see in my picture.
I have distressed all edges on both sides with Distress Ink – Vintage Photo.


Her har jeg valgt mønsterpapiret jeg vil bruke. Mitt papir er fra Pion Design – Sagan om våren.
Utvendig trenger du : 14cm / 3,5cm – 2stk
                                 5,5cm / 3,5cm – 2stk
Innvendig trenger du: 14cm / 3,5cm – 1stk
                                 5,5cm / 3,5cm – 2stk
                                14cm / 5,5cm – 1stk

*******

Now I choose my Patterned paper. I will use papers from Pion Design.
On the outside you need: 14cm / 3,5cm – 2pcs
                                        5,5cm / 3,5cm – 2pcs
On the inside you need: 14cm / 3,5cm – 1pcs
                                      5,5cm / 3,5cm – 2pcs
                                    14cm / 5,5cm – 1pcs


Her er utsiden dekorert.

******
Here I have decorated the outside.


På innsiden dekorerer jeg først bunnen og de to kortsidene.

******

On the inside I start by decorating the bottom, and the small sides.


Så limer jeg esken sammen ./ Now I glue the box together.
 

Så limer jeg på langsiden, og skjøtene blir skjult.

*******
Now I add the long side, that will hide the edges.


Til ryggen bruker jeg en Spellbinder dies, og jeg kutter bare toppen av papiret.
Jeg klipper papiret til målene 11,5cm / 13,5cm. Da får jeg plass til et panel rundt.
Hvis du som meg liker å dekorere baksiden også, så kutter du til en maken papirbit. Høyden på denne trenger ikke være mer enn 7,5cm.

*******
For the back of the box I use a Spellbinder dies, but I only cut the top of my paper.
Cut the paper to fit these dimensions: 11,5cm / 13,5cm. Now you have room for a panel around the paper.
If you are like me and like to decorate the backside as well, then make a second paper like this. The hight of this one doesn`t have to be more than 7,5cm.


Jeg limer papiret til en kartong….

*******
Now I glue the paper on some cardstock….


…og klipper fasongen rundt for hånd med en god saks.

*******
..and cut the shape by hand with a good scissor.


Til bunnen bruker jeg ”around the page” puncher fra Martha Stewart.
Kartongen min er 6 ¾” / 3 ¼” før jeg puncher.

*******
For the bottom I use ”around the page” punches from Martha Stewart.
The cardstock is 6 ¾” / 3 ¼” before punching.


Jeg pynter ryggens forsiden før jeg limer den på esken. Her har jeg tatt dobbeltsidig teip på den nederste delen av ryggen.

*******
I decorate the back panel before I attach it to the box. Here I have added double sided tape to the lower part of the back.


Fest ryggen til esken…

*******
Attach the back to the box….


..og lim på mønsterpapir om du vil.

********
..and add patterned paper if you like.


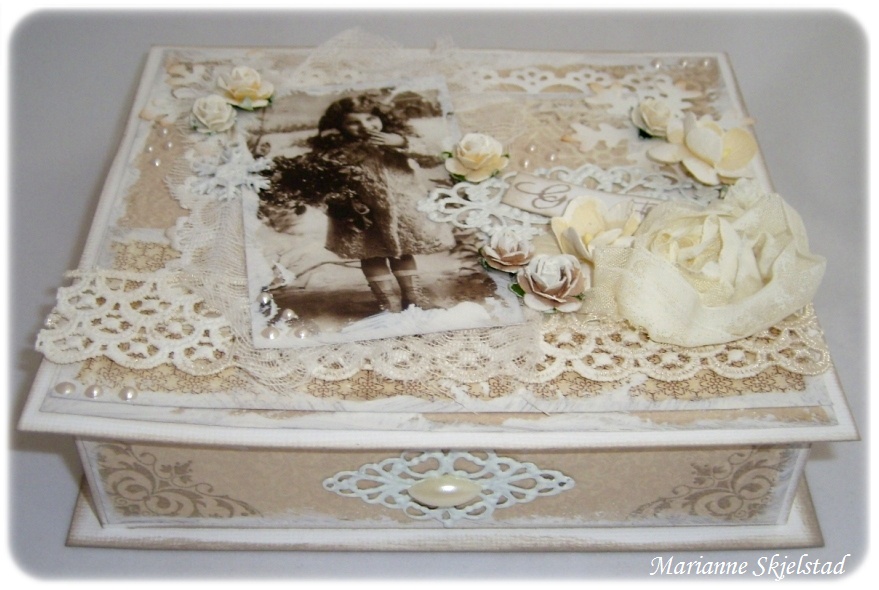
Det var det hele. Her er det ferdige resultater.

******
That was all. Here is my tea box completely finished.


Her har jeg laget en maken eske som passer til kaffe.

*******
Here I have made a same sized box, fit for coffee.


Jeg lovet noen flere eksempler.

Her er en eske som passer til to mini kubbelys.
Kartong: 16cm / 12cm
Preg 4 cm inn fra alle sider.

******

I promised you some more examples.

This box fits two mini candles.
Cardstock: 16cm / 12cm
Score 4cm in from all four sides.


Min siste eske passer til store telys.
Kartong: 14cm / 14cm.
Preg 4cm inn fra alle sider.

*******

My last box fits big taelights.
Cardstock: 14cm / 14cm
Score 4cm in from all four sides.


Jeg håper dere likte tutorialen min:)

I hope you all enjoyed my tutorial:)


Friday, September 9, 2011

The winner of our September challenge- Something in Shabby Chic style


The time has come for us to announce the winner of our September challenge- Something in Shabby Chic style. At first, thank you so much for all the so beautiful and amazing entries. 
There was absolutely so many beautiful cards and creations that the winner is choosen by random:)

Our sponsor is Pysseltagen who is kindly offering a great prize for the winner.


And the WINNER is

*

*

*

*

*

*

*

*

*

*

*

*

*


Number 16.    Helena   with this beautiful card


Please contact us to our mail; stampartic@gmail.com
so you can get your fabulous prize:)

Wednesday, September 7, 2011

A sad goodbye and a DTcall!!

Det blåser en förändringarnas vind i StampARTic´s designteam.

Jorunn - StampARTic´s skapare och en eldsjäl bland kortmakare har valt att lämna teamet.
Hon har lagt kortmakeriet på hyllan en tid då mycket annat händer i hennes liv just nu.
Även vår enormt talangfulla Rikke har valt att gå vidare.
Vi får tacka för den här tiden tillsammans!
Vi är otroligt tacksamma över att fått arbeta tillsammans med Er och lärt känna Er.
Ni har varit ovärderliga i arbetet med att driva denna webbtidning, vi förstår dock att livet går vidare,
så stort lycka till i framtiden tjejer! 
 Vi kommer sakna Er!!


It´s blowing a wind of change in StampARTics designteam. 

Jorunn - The creator of StampARTic, and a driving force amongst cardmakers
has chosen to leave the team. 
She has taken a break from cardmaking for some time, due to many other things that's going on in her life right now. 
Also our hugely talented Rikke has chosen to move on. 
We want to thank you for this time together! 
We are incredibly grateful to have had the opportunity to work with you and get to know you. 
Your efforts in running this website have been invaluable. 

We understand that life goes on, 
so good luck in the future girls!     We will miss you!!


Nu till något betydligt roligare!!
Vi söker två nya designers till vårt designteam!

Jobbet innefattar bl.a att skapa inspirationskort till olika sponsorartiklar & utmaningar.
Vi vill även att du hjälper till med det administrativa för att StampARTic ska kunna fortsätta publiceras.
Jobbet kräver i genomsnitt ungefär någon timme i veckan framför datorn.
Vi ser även att du är någorlunda duktig på engelska.


Now for something much more fun! 
We are looking for two new designers to our designteam!

The job includes, among others, to create inspirationcards to various sponsorarticles and challenges. 
We also want you to help us with the administrative work so that StampARTic can continue  publication. 
The job requires an average of about one hour per week in front of your computer. 
We would also like for you to be reasonably good at English.
         
     Regler:
  • Du måste bo i Skandinavien (Danmark, Finland, Norge eller Sverige)
  • Tolka skissen här nedan och skicka därefter in Ert bidrag till: stampartic@gmail.com
  • Vi vill även ha ditt namn, nationalitet och din bloggadress med i mailet. Märk mailet med "DTcall".
  • Endast handgjorda kort är tillåtna som bidrag.
  • Sista ansökningsdagen är Fredagen den 30 September, kl 23.59 *pip*

     Rules:
  • You have to live in Scandinavia (Denmark, Finland, Norway or Sweden) 
  • Make a card after the sketch below and send it to: stampartic@gmail.com 
  • We would also like to have your name, nationality and your blog address in the email.  
  • Mark the mail with "DTcall". 
  • Only handmade cards are allowed to participate. 
  • The deadline for applications is Friday 30 September, 23.59 *beep*


Vi kommer hålla en extra koll efter danska sökande
då vi för stunden saknar tjejer från Danmark i vårt team.
Men vi kommer först och främst att välja från hjärtat!

STORT LYCKA TILL!!!

We will keep an extra eye on Danish applicants  
because at this moment we don´t have any girls from Denmark in our team.
But we will first of all choose from the heart!

GOOD LUCK!!!

Saturday, September 3, 2011

Twinkling H2O

This time the ARTsy-team has gone "wild" with twinkling H2O colors.

Do you remember the colors? Maybe you are like us, having a lot of colors hidden in your closet or drawer :-)

Anyway, we have played with these watercolors, and hope to inspire a lot of you to take the colors and make the most beautiful backgrounds. Enjoy, and do leave a comment for us to see your card!

Denne gangen har vi lekt oss med Twinkling H2o. Husker du disse vannfargene vi lekte med tidligere? Har du som oss glemt fargene, og lagt dem langt bakerst innerst i skapet eller skuffen? Vi har iallefall tatt frem fargene, og satt i gang med bakgrunns lek. Håper vi kan inspirere mange til å ta frem fargene. Lek deg med fargene, og legg gjerne igjen en kommentar så vi får en titt :-)

Connie's cards...

This card is made with watercolorbrush and lots of water sprayed on the paper in front of coloring. Easy, fast and lovely colors!

This card is made by spraying water on a none stick matt and applying H2O-colors to the sheet. Background papier is laid down on the none stick matt several times until this result.

Silje's card...

Background is applied on the background sheet with a spatel, water and Primary Elements powder. Flowers is colored with H2O and gesso, and the snow is made with gesso.

Inger's cards...

Background made with H2O painted on wrinkled tissue paper. Stamped with H2O.

Background painted with H2O painted in circles, lightest in the middle. Flicked with H2O on a toothbrush. ed with H2O on a toothbrush.

Fish is painted with H2O and the background is made with H2O and salt.Fish is painted with 2O and the background is made with H2O and salt.

rd made to look as a closed book. Cardstock and book pages painteth H2O.
And, now to the winner of our challenge:

The prize is sponsored by:d,


The winner of our draw is:

- the one who wrote comment nr 6 -

Elines blogg


Congratulations as our winner!
NB! Please contact us at artsyteam@gmail.com in order for us to send you your prize!

We would also like to say thank you to all your bloggers that wrote a comment to our post!

ed by:


Thursday, September 1, 2011

September challenge

It is time for our September challenge here at StampARTic. Did you all see Minnas fabulous
shabby chic tutorial? If you missed it, you can find it here. We in StampARTic DT got very inspired by this tutorial, and I believe that goes for the rest of you too, so here is our September challenge:

Make a card or paper creation in SHABBY CHIC style.

Pysseltagen will be our sponsor for September, and they have a great prize waiting for a lucky winner!
Do you remember our Pysseltagen article and DT inspiration? If you missed it, you can find it here.


Here is some shabby inspiration from DT.

Marianne


Lene


Eva


Malin


Minna


Jannhild


Maissi


Petra


To enter the challenge, please leave your name and a link

to your card in the Mr Linky scheme below.

Deadline is the 8th of September, midnight StampArtic time.

GOOD LUCK!